Support
TutorDesk seamlessly connects all your tutoring needs to deliver a professional experience for you, your tutors and your students and is suitable for small one tutor businesses to large multi-tutor businesses.

Fees and Subscription Management User Manual
TutorDesk seamlessly connects all your tutoring needs to deliver a professional experience for you, your tutors and your students and is suitable for small one tutor businesses to large multi-tutor businesses.
Accessing Payment Portal and Connecting to Stripe
1. Open a web browser on your computer. Google Chrome is preferred.
2. Go to https://thetutordesk.co.uk and click on Sign In.
3. Click on the ‘Sign in with Google’ button or with the given username and the password.
4. Go-to the Institute Admin Portal.
5. You will be directed to the Institute Admin Dashboard. Goto the Menu on the top left-side of the page.
6. When you are in the Menu, Click on ‘Settings’ and go-to ‘Fees and Subscriptions’.
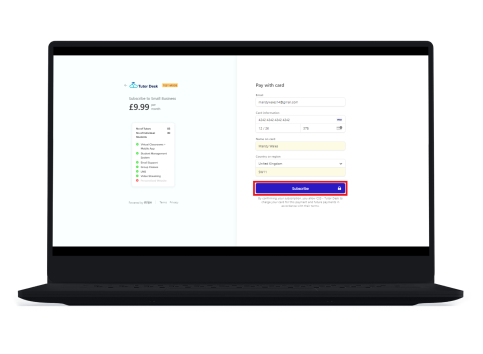
7. You will be directed to the ‘Transaction Reports’ page of the TutorDesk Payment Portal. In this page you will be able to view all your transactions, which include your payments and the fees that you have received from your students.
When you first visit this page, you will be asked to Connect your Stripe Account as below. This means that you can connect your Stripe Account to TutorDesk, so that you can make and receive payments related to TutorDesk via Stripe.
Click on ‘Connect Now’.
8. You will be directed to the ‘Stripe Checkout’ page. Click on ‘Enable Stripe Payments’.
Then click on the ‘Connect with Stripe’ button.
9. You will now be directed to the Stripe registration page. Henceforth, you will have to enter your basic personal details, bank account details and institute details to get registered with Stripe.
Enter your email address and the password and click on ‘Continue’.
10. Enter your mobile number and click on ‘Send text’..


11. A verification code will be sent to your mobile phone. Enter the verification code.

12. You will now be displayed ‘Emergency Backup Code’ on your screen. Make sure to download the code and store it somewhere safe. In case your device is ever lost or stolen, you can use this code to unlock your Stripe account.
Click on ‘Next’ when you have saved your code.
13. Enter your Institute/Business details and click on ‘Continue’.

14. Enter your personal details and click on ‘Continue’.

15. Enter your business details and click on ‘Continue’.
